Project Settings allows you to manage your projects and offers project level customizations. It can be only accessed by Super Admin or Project Admin.
In order to access project settings:
Manage All Projects
Once landed, you will see the list of your projects. List of projects will show the only list of projects, where you are the member of the project. If you have Project Admin rights, you can access and change these project settings. You can create new projects and manage all your projects here.
- Add New Project
- Manage Users
- Settings
- Archive
- Delete
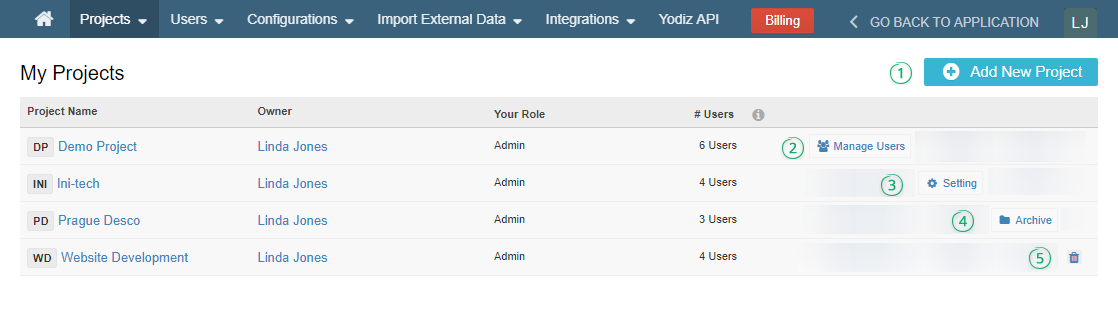
1. Add New Project
You can add a new project by clicking on the “ Add New Project” button provided on the top right side. Follow the link, to understand the process of Project creation.
2. Manage Users
You can change User Role, add users, invite new users, and remove users from the project.
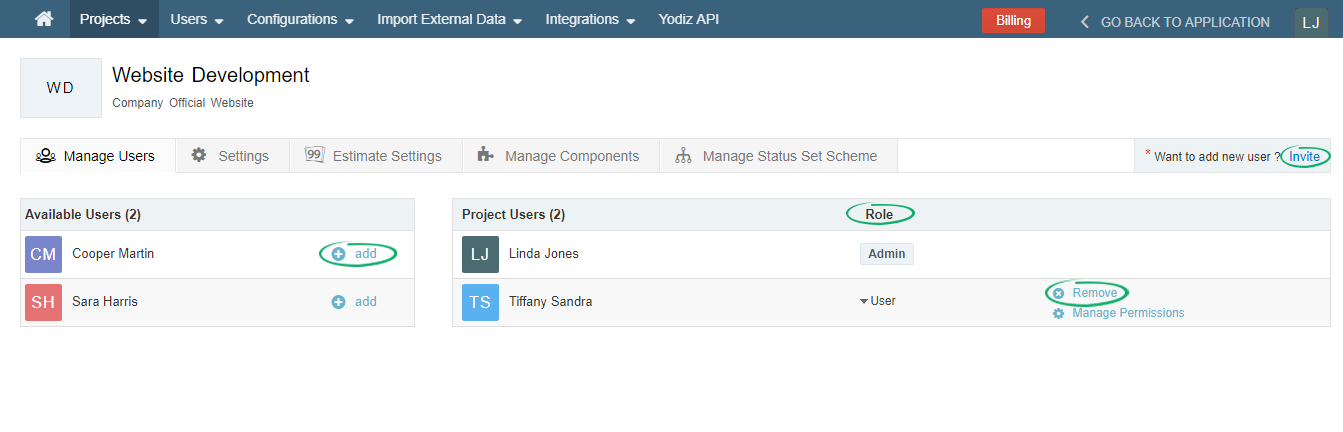
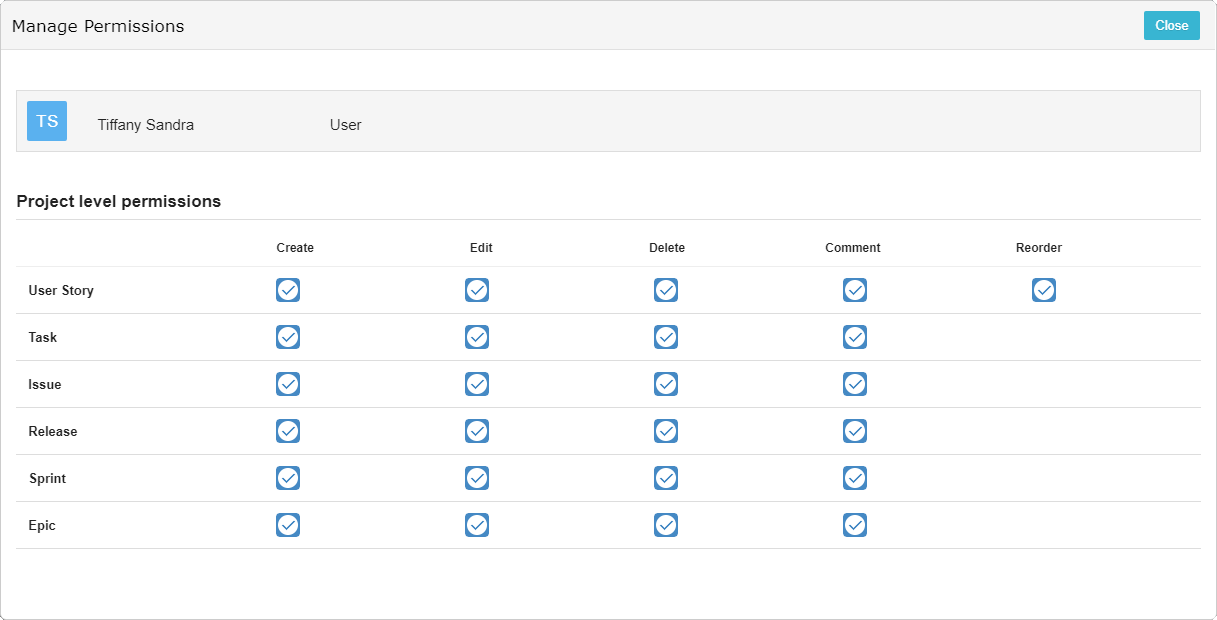
At the same page, you can manage team members project level permissions against each Item type. By default, all users have access to all Item level permissions. These permissions are project specific and will not impact user rights of other projects.
3. Project Settings
Project settings are defined when you are creating the project. You can change these settings later. But, it will impact your existing project data, accordingly.
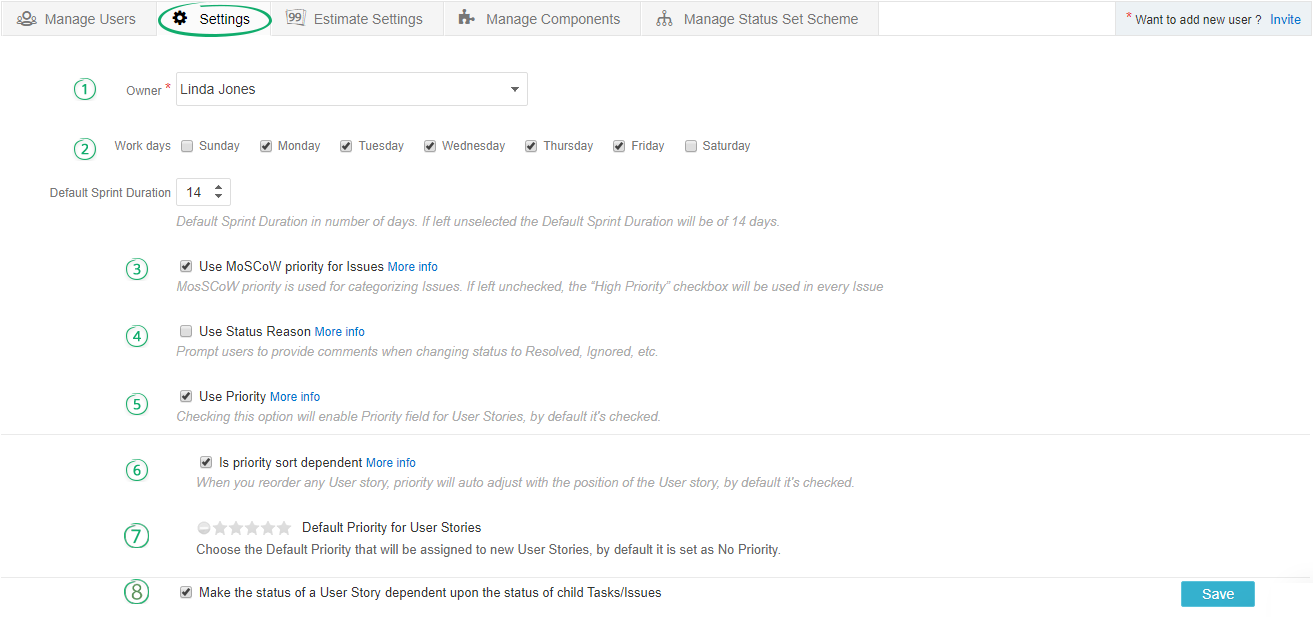
1) Owner: You can change the owner by selecting user name from dropdown. By default, the owner of a project is the user who created the project. Any project user can be the owner of a project. Being Project Owner does not impact its User Role.
2) Work Days: Define workdays for your team. All 7 days of the week are selectable. This is useful for the teams who track project effort using Timesheets.
3) MosCoW priority for Issues: Yodiz supports priority field with simple “High Priority” or 4 level “MoSCoW” priority. The 4 levels of MosCow priority include:
- Must Fix
- Should Fix
- Could Fix
- — (No priority)
MosCow priority is used for categorizing issues, if you leave this box unchecked, by default each new Issue will automatically have set priority as “High Priority”.
4) Use Status Reason: Mark this option if you want users to provide a reason for the status change. For example, whenever issue Status is changed to Resolved or Closed category, the user will be prompted to enter the reason. This reason will be added to the comments with the prefix [Resolve Reason]. Learn more about status reason.
Note: Enabling “status set reason” at project settings will not impact until you enable it at Item type level in “Manage Status Set Settings”.
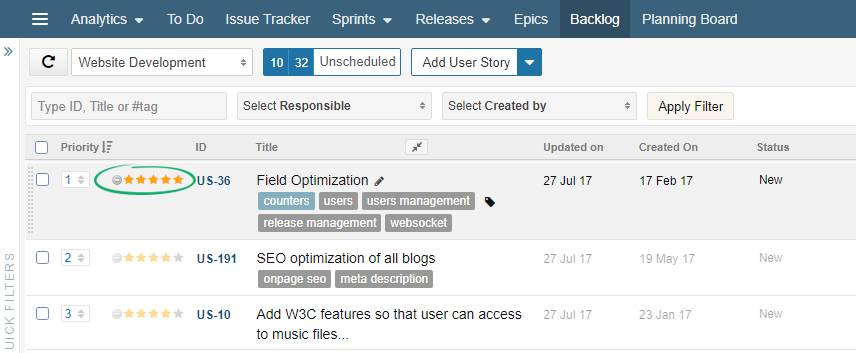
5) Use Priority: This feature enables or disables the use of Star Priority ratings for User Stories in the Project Backlog. Star Priority is an optional priority feature, in addition to Number priority. Number priority cannot be disabled for all User Stories. Start Priority can be set in Item details. Learn more about Using Priority
6) Is priority sort dependant: This feature, when checked a priority rating is given to User Stories, they will be automatically sorted according to their priority, on the Backlog board. E.g. User Stories with 5 stars of priority will appear above stories with 2 Stars of priority. Learn more
7) Default Priority for User Stories: The 5 stars are provided with this option. You can select the number of stars that you want for new User Stories as default priority. Selecting this option will set this priority as default at the creation of a User Story.
Note: Number priority is shown only if you select “Unscheduled” in this drop down filter.
8) Status Dependent Items: Use this option to automatically change status of all associated items to “Completed” whenever User Story status is set to “Done”.
You can find out more details about the Project fields and their purpose from Project Creation Guide.
3.1 Estimate Settings
You can switch your estimation method using this tab. User Stories supported estimation methods are Hours (01-99) and “Points”.
You can choose among different Point Estimate methods:
- Linear(1,2,3,4,5,6…99,100)
- Fibonacci (0,1,2,3,5,8,13)
- Scale-100 (0, 0.5, 1, 2, 3, 4, 5, 8, 13, 20, 40, 100)
- T-Shirt Size (XS, S, L, XL, XXL)
Each team usually selects one estimation method for their project and stick to it throughout the project duration. Learn what is impact of switching an estimation method.
3.2 Manage Components
You can manage components for your project from this tab. You can create new components, change the default assignee and delete previously created components from this tab.
Components are project specific. Components can be used to group data, filter data and for generating graphs. Multiple components can be used for different grouping purposes.
3.3 Manage Status Set Scheme
This tab allows you to manage your current Status Set Scheme. You can switch status set scheme from here, add, edit or delete statuses.
Learn more about Status Set Scheme.
4. Archive
This option on the project listing page will archive any of the projects you choose. You can archive projects that are closed now or delayed for the time being. You can also create projects and archive them for later use.
The archived projects will still show up in the project list with an “Unarchive” button displaying next to the project.
5. Delete
A bin icon is displayed at the right end of each project on the list. You can delete a project when you no longer need the data stored in the project. Deleting a Project will detach its members and custom fields from the project and delete all its data as well.