Intercom integration with Yodiz enables the development team to view, plan and fix customer issues without switching between applications. Link Intercom conversation to Yodiz issue or User Story. Make required changes, and directly inform the client about the fix through integration pages.
1. Add Intercom Account
To integrate your Intercom account in Yodiz:
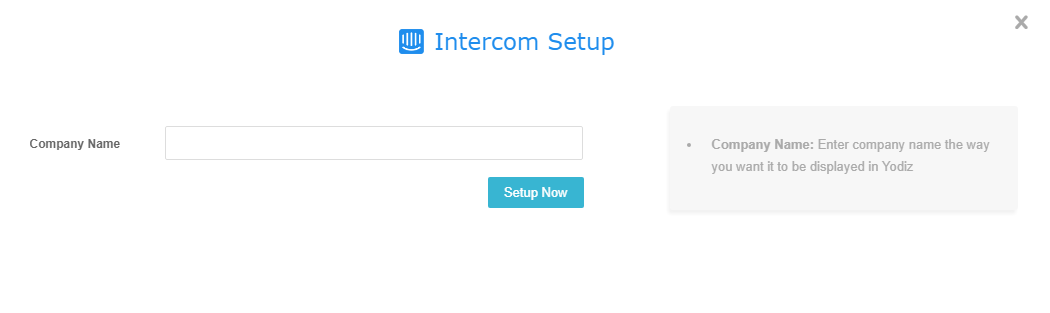
- Add the Company Name that will represent your Intercom account.
- Click on Setup Now.
- Intercom Admin login page will ask you to enter intercom Email. Use the email, you used while signing up for Intercom.
- Clicking on the account will fetch its conversations under Conversations panel
2. Working with Intercom conversations
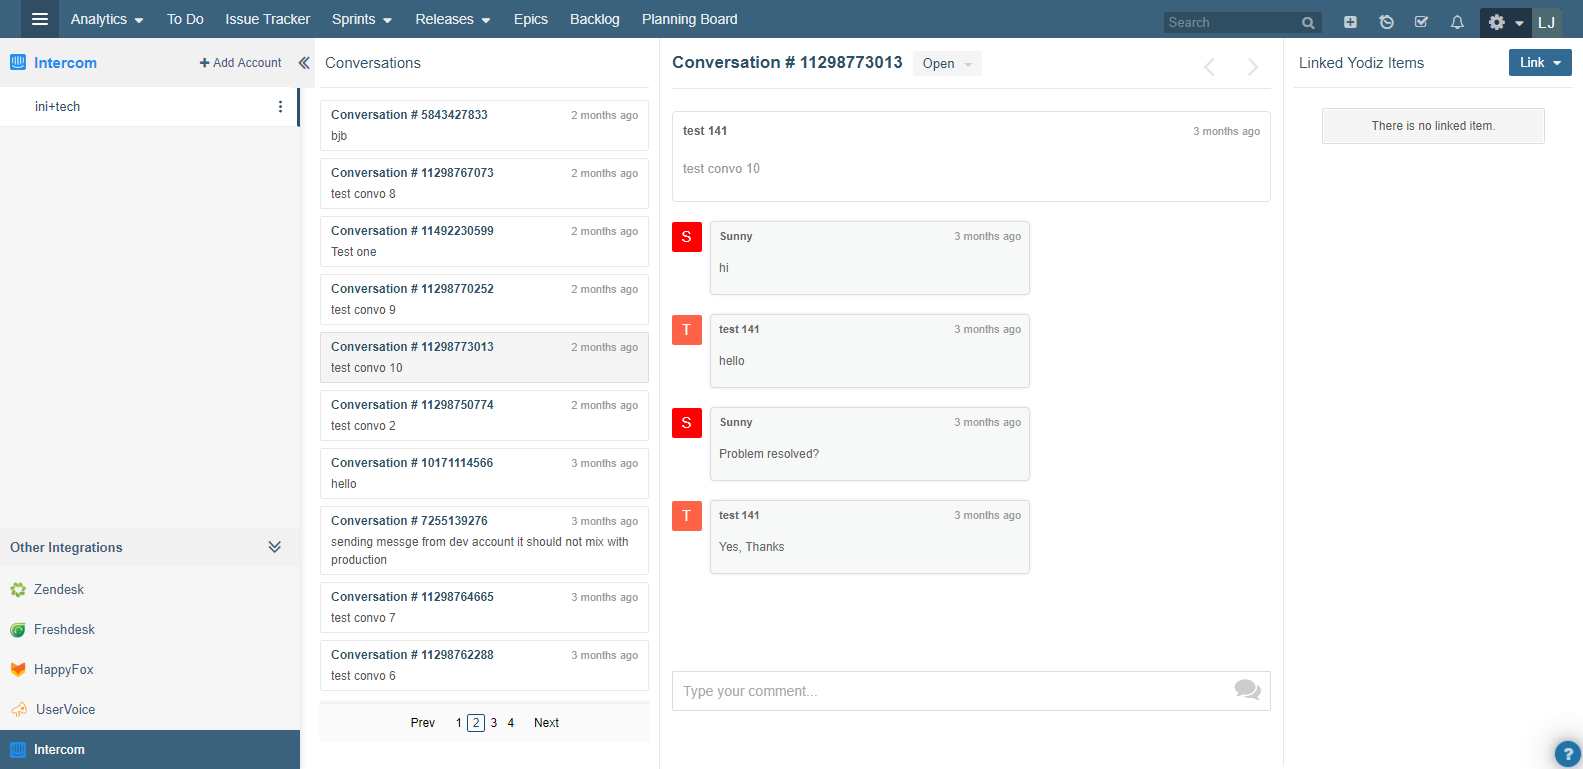
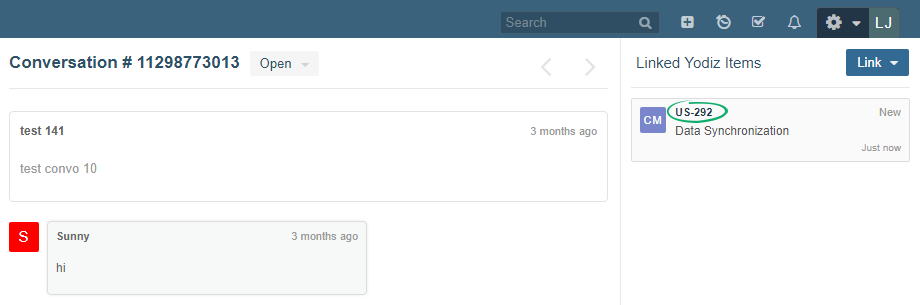
Yodiz-Intercom integration page shows information in 4 hierarchical panels.
- Linked Intercom account
- List of conversations
- Details of Selected conversation
- List of linked Yodiz Items
2.1 Respond to Intercom conversations
At Intercom integration page, you can view complete conversation and respond to the customer without leaving Yodiz. Changing the status of conversation in Yodiz, will generate response on Intercom and notify customer.
Note: Status of conversations can be changed from status dropdown
- By default, conversations are sorted by latest updated order.
- Closing a Conversation in Yodiz will automatically close the conversation in Intercom as well. At closing, a message will be automatically added “Closing this conversation”.
- Clicking on Intercom Icon will lead you to Intercom pages and opens the specific intercom ticket details.
2.2 Link conversations with Work Items
Any Intercom conversation that seems like a requirement or bug can be linked to either an existing or new Yodiz User Story or Issue. Linking will copy the conversation title, first message, and attachment to Yodiz item. A unique tag will be added to Yodiz item to indicate conversation. A user can navigate from any Yodiz board to intercom integration page by clicking on this unique intercom tag shown on Item Card. This way, you can read any updates on that particular conversation.
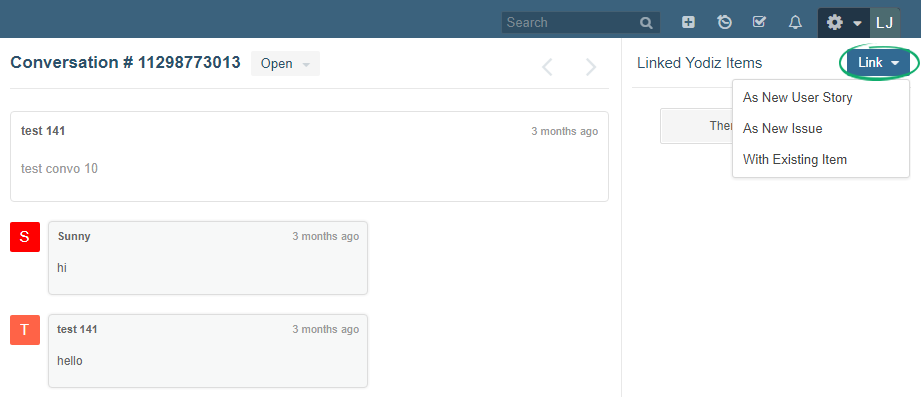
Intercom conversation linking to Yodiz Item: Use Link drop-down button to link items.
2.2.1 Linking to New Yodiz Item
If you are linking to a new Yodiz item then, it will copy the title, the first message of this Intercom conversation. An intercom tag will be automatically added in Yodiz item to view complete list of messages on integration screen.
- Clicking on this tag will apply filter on your board and show relative results.
- Clicking on tag icon will navigate a user to integration screen page directly.
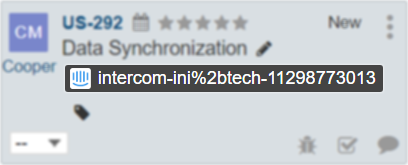
Note: If Item Card on your board does not show tags, you can change Item Card configurations.
2.2.2 Linking to Existing Yodiz Item
If you are linking to an existing Yodiz item then, it will not copy this Intercom conversation information to existing Yodiz item. An intercom tag will be added in Yodiz item to view conversation.
2.3 Unlink conversations with Items
To unlink conversations with Yodiz items, remove its integration tag from item tags field.
- Locate and click on the linked Item ID.
- Remove the Tag (consisting of service name-domain name-conversation ID) from the Tags field and Save.
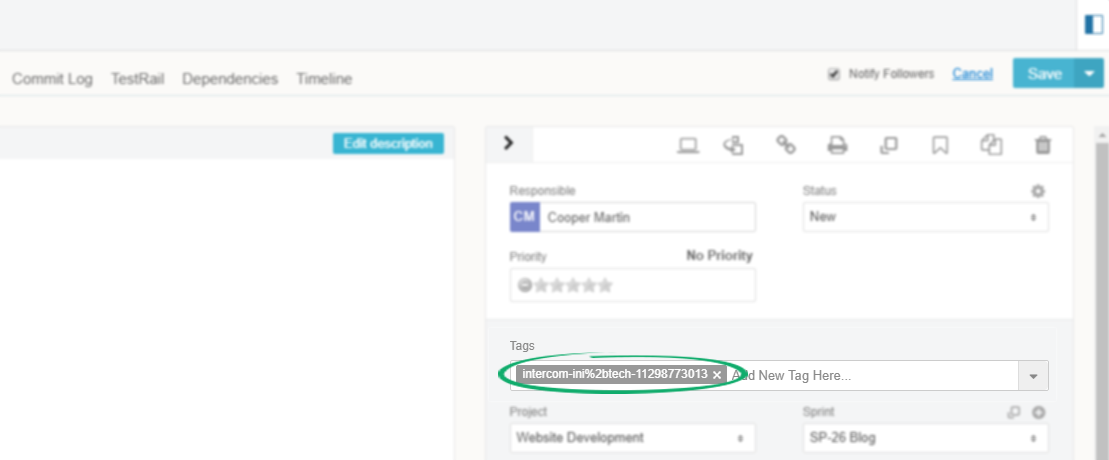
Integration tag can be quickly removed through an item card of a board. Mouse over on the tag and click on x besides tag name.
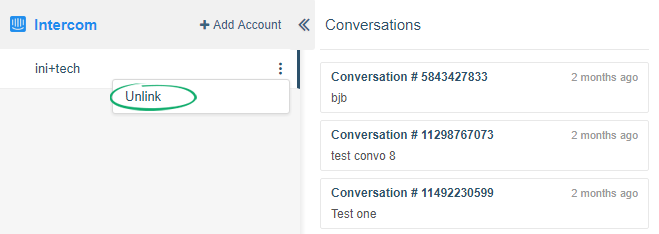
3. Unlink Account
Integrated Intercom account can also be unlinked from Yodiz.
- From Navigation menu, select Integrations > Intercom
- The list of integrated accounts can be viewed in the far left panel of the Intercom Integration screen.
- Click on the ellipses icons and select Unlink option.