Adding a new status in your current workflow is easy. While working on a project board, you just realised that team should have a new status then:
Go to board Right Navigation menu > Setting > Customize Cards and Panels
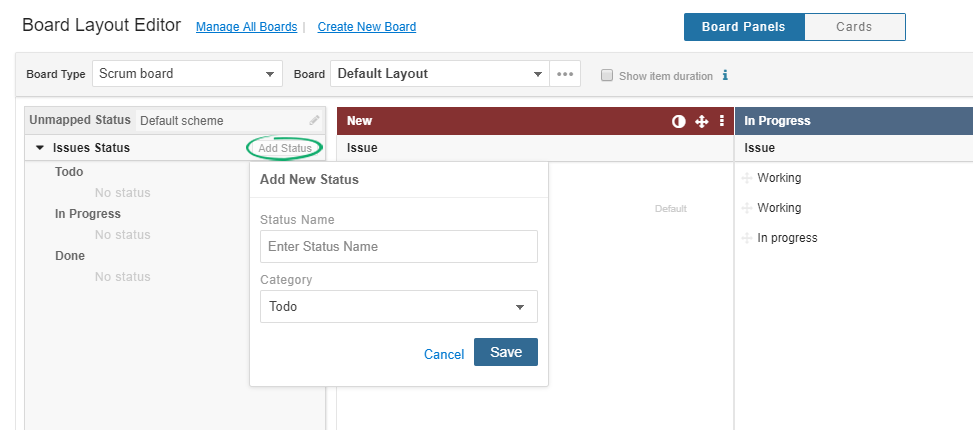
Using Board Layout Editor
Each Yodiz board layout follows a workflow. Statuses are defined in the workflow, but you can further arrange these statuses in different panels/columns of a board by using Board Layout Editor (customize cards and panels). If you do not want to use a status in your board, then simply place it under the unmapped column. Changes in a board layout will impact all boards that are following the same board layout.
In order to access Board Layout Editor, open the respective board and follow the navigation:
- Go to Right Navigation Panel > Settings > Customize Cards & Panels
- A popup will open giving you the ability to Add Status to Unmapped Status section.
- Add new status to your Workflow Scheme and set its category at the same time.
Note: “Add Status” option is only accessible for Super Admin.
Access to Board Layout Editor is handled under individual user global permission.
Added Status will be placed in selected status categories of Unmapped Status. Drag it to the desired panel for status mapping.
Note: USER role cannot edit or delete a status via Board Layout Editor. Deleting a status on a board will only hide the status from that board. You can still see such status under the Unmapped column of layout editor.
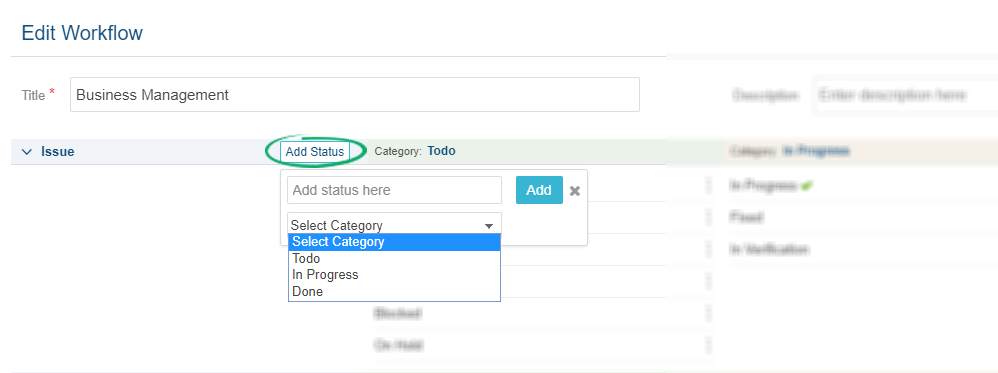
Add New Status In Workflow Configurations
Adding a new status through Workflow configurations will create new status and it will be immediately available under the same item type statuses of associated projects.
Note: This new status still need to be configured in your Project boards layout separately.
Workflow configurations are handled under Configurations:
Go to Navigation menu Settings > Configurations > Workflow
Note: Complete access to Workflow Scheme needs Super Admin rights. A Project Admin can update that particular project workflow.
- Each item type has its own option to Add Status.
- For example, click on Add Status button in the Issues tab.
- A mini pop-up will open asking to fill in essential details
- A new status in the workflow will be added to all boards that are following it.
- It will be available in all projects that are using the same workflow. Although, this new status will be placed under the unmapped column of the board layout editor. You can use it in your existing boards by mapping it to the board panels.
Note: To use the newly added status in a board, select board type from navigation menu > select your project > Settings > Customize Cards & Panels.