Zendesk integration with Yodiz enables development teams to view, plan and fix customer tickets with ease. You can convert Zendesk tickets into Yodiz Issues or User Stories.
1. Access Methods
In order to access the Zendesk integration. there are two ways:
Note: If you could not find following menu options then contact your organization Yodiz admin. for the access. Integrations access can be restricted by Super Admin.
- Via Administration
To access Zendesk:
- Go to Main Navigation Menu rightmost settings icon > Administration
- Select from Navigation menu, Integrations > Zendesk
Tip: Administration part of application is only visible to users, having specific Admin rights.
- Via Integrations Menu
- Go to leftmost Navigation Menu > Integrations > Zendesk
2. Add Zendesk Account
To integrate your already existing Zendesk account in Yodiz:
- Go to Zendesk Integration page by clicking on main navigation menu, > Integrations > Zendesk
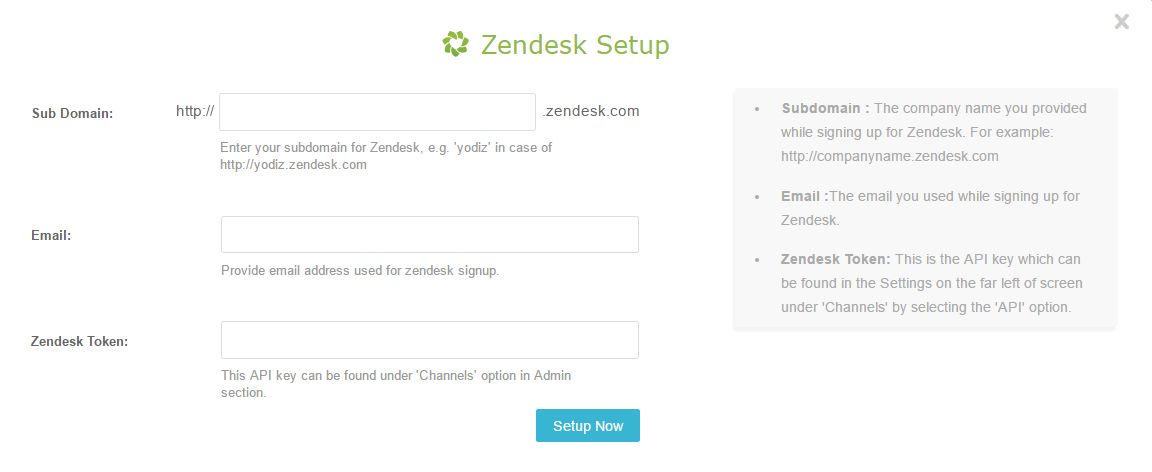
- Add Account by entering SubDomain, Email and ZenDesk Token
- Fill in following details and click on Setup Now
Sub Domain: You get Sub Domain, when you sign up for a Zendesk account. This is usually your company name. For example, if yodiztest is your domain name then your sub domain would look like: https://yodiztest.zendesk.com.
Email: The email, you used while signing up for Zendesk.
Zendesk Token: is actually Zendesk API key. See How to get access key
- Clicking on the account will fetch its tickets on the right side of panels
3. Working with Zendesk Tickets
Yodiz-Zendesk integration page shows information in hierarchical 4 panels.
- Linked Zendesk account
- List of tickets
- Details of Selected ticket
- List of linked Yodiz Items
3.1 Search Zendesk Tickets
In Yodiz – Zendesk integration page, you can view ticket description, comments and attachments in comments. you can search tickets with 2 types of built-in filters.
- Context filters: Use Search drop down menu to see context filters. Follow the screenshot below:
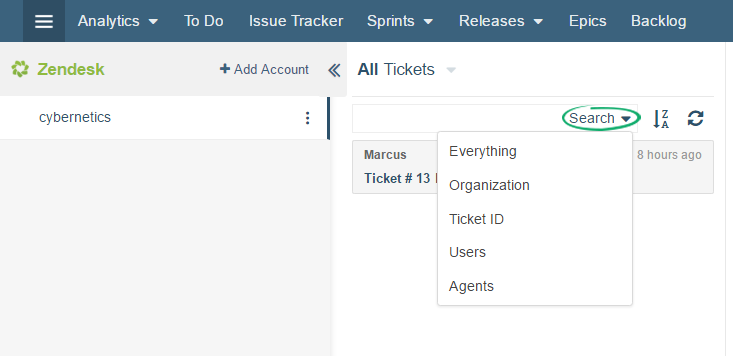
Note: “Everything” in search, looks for Ticket Description, Title and Comments but NOT the Ticket ID.
- Status Filter: You can also Filter Tickets by their Status.
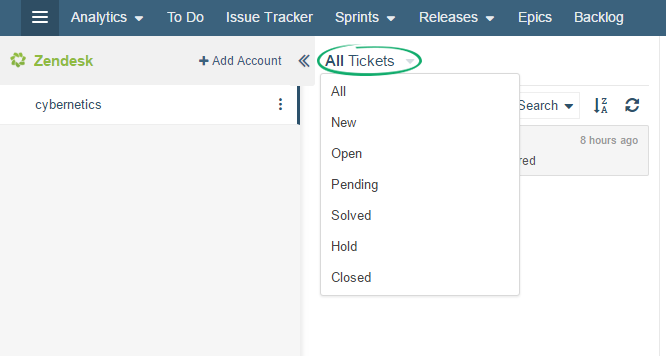
Note:
- Status of Tickets can be viewed in the header of selected Ticket.
- Tickets with Closed status do not allow for any further comments or status change.
- By default, Tickets are sorted by latest updated order.
3.2 Link Tickets with Items
Zendesk ticket can be linked to an existing or new Yodiz item (User Story, Issue). Linking will copy ticket information to Yodiz item. Use Link dropdown button to link items.
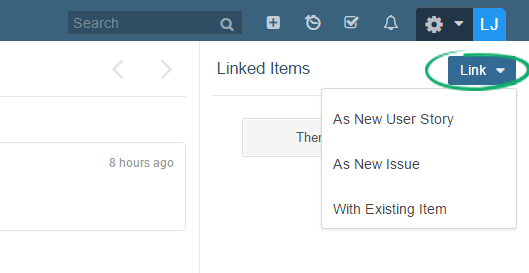
3.2.1 Linking to New Yodiz Item:
If you are linking to a new Yodiz item then, it will copy following Zendesk ticket information: Title of Ticket, Description, and attachments (of comments, if there is any)
3.2.2 Linking to Existing Yodiz Item:
If you are linking to an existing Yodiz item then, it will not copy this new Zendesk ticket information to existing Yodiz item. A Tag will be automatically generated in Yodiz item for this ticket linking.
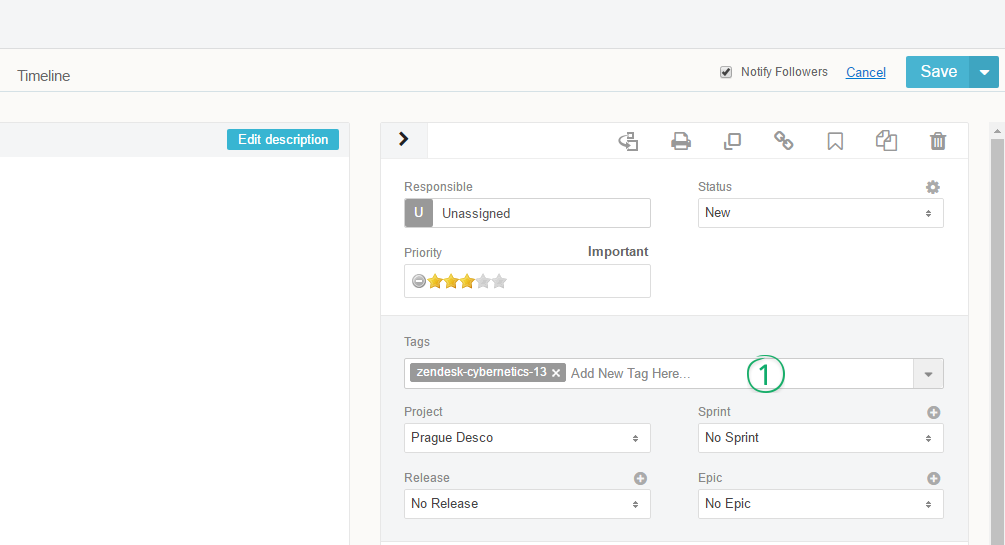
3.3 Unlink Tickets with Items
To unlink tickets with Yodiz items,
- Locate and click on the linked Item ID.
- Remove the Tag (consisting of service name-domain name-ticket ID) from the Tags field and Save.
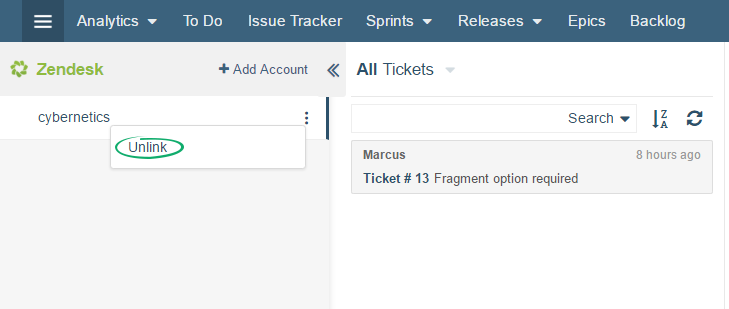
4. Unlink Account
Integrated Zendesk account can also be unlinked from Yodiz.
- From Navigation menu, select Integrations > Zendesk
- The list of integrated accounts can be viewed in the far left panel of the Zendesk Integration screen.
- Click on the ellipses icons and select Unlink option.
FAQs (Frequently Asked Questions)
-
Can I use more than one Zendesk accounts in Yodiz?Yes, you can add more than one Zendesk account in Yodiz. Add your existing Account from Zendesk integration page.
-
What information is included in ticket linking?Ticket linking copies ticket title, description, attachment and a tag is automatically added to Yodiz item. Tag format is: “service name-domain name-ticket ID”.
-
If there is change in ticket description later, then will it be copied to Yodiz item?Yes, Zendesk ticket description changes are fetched and viewed from zendesk integration pages in Yodiz. Note: Description of Yodiz item is copied only when you link the item for the first time. Any later changes in Zendesk ticket will only be shown in zendesk integration pages.
-
Why I cannot see linking to a User story, option in integration pages?Possible reasons are:
- Check your User rights that if you can add a user story generally in that project or not.
- User Story linking is for the users, who are using complete Yodiz Agile Lifecycle Management tool. If you are using Yodiz Issue Tracker Only, then User Story option will not be available.
-
Can I link a ticket to different project?Yes, you can link a ticket to any project. If you link a ticket to a Yodiz item then at the time of link creation, you will see item information in Detailed view. Here, you can change Project field value and save it. You can later change project field value as well.
-
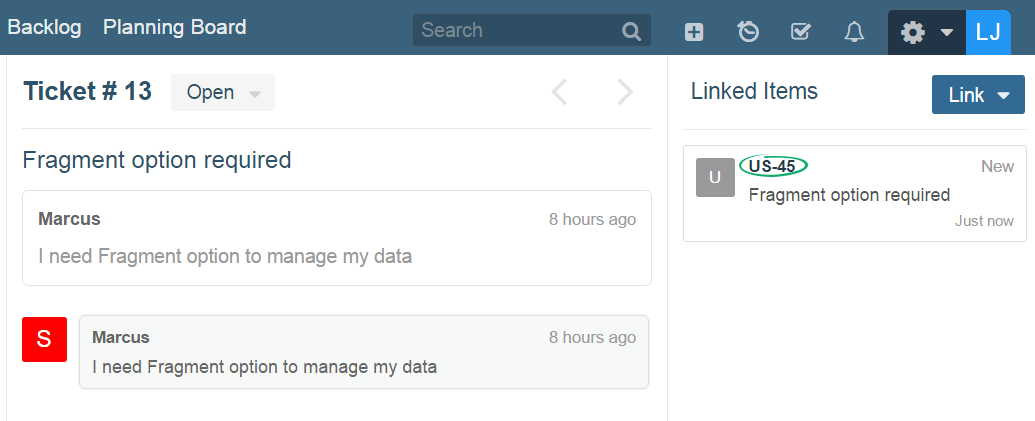
How can I know, that ticket is linked to which item?Zendesk integration page in Yodiz shows linked items on the right most panel. Select a ticket from left panel and it will show all linked items accordingly.
-
Can I see details of a ticket quickly?On Yodiz boards, linked items show tags in widget view. if you click specifically on green zendesk icon mentioned on a tag , it will directly take you to that particular ticket on zendesk integration pages and you can see ticket details, comments and attachment. You can also see list of other linked yodiz items on right most panel.
-
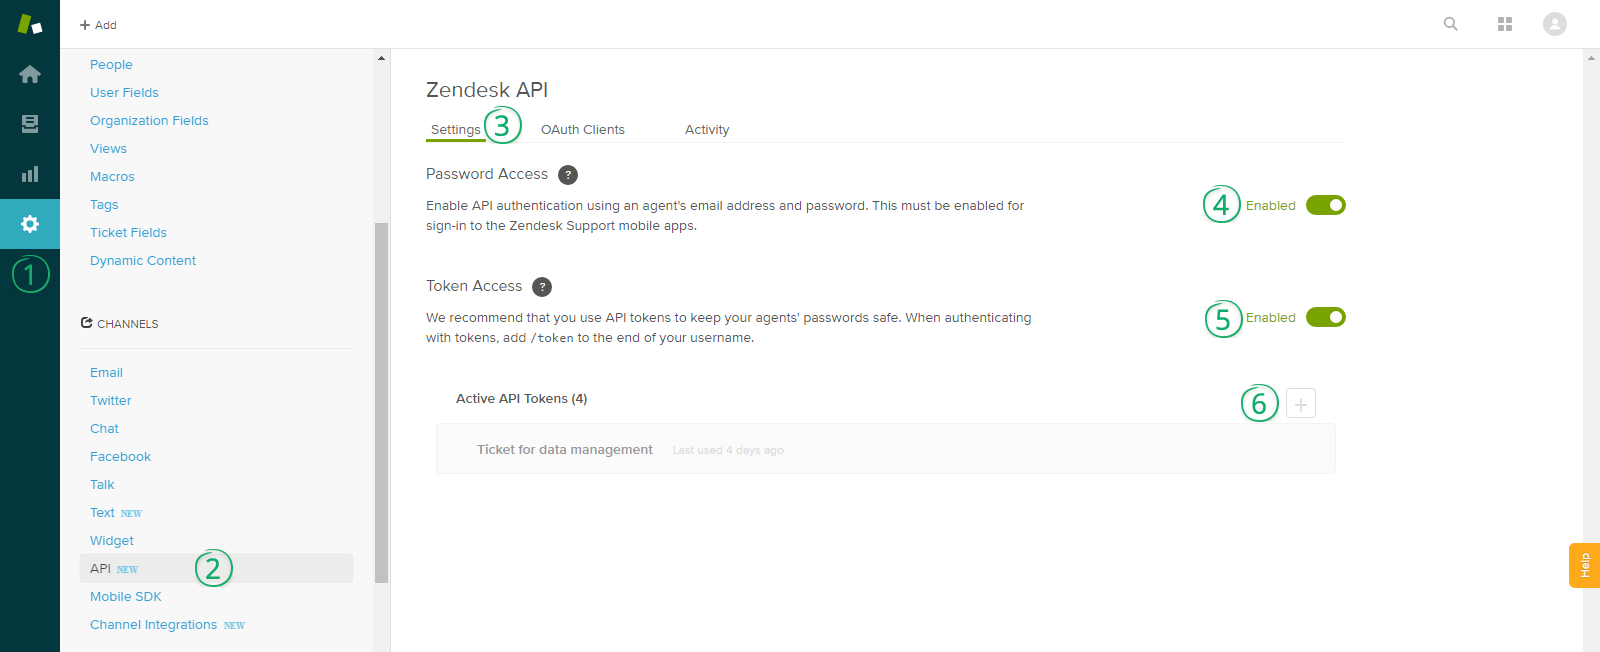
How can I get zendesk token?Zendesk API key is the token that you need while integrating with Yodiz. To get Zendesk key:
- Login to Zendesk
- Click on Settings icon on the far left menu titled as “Admin”
- Locate section Channels > and click on API
- Enable the Password Access and Token Access options.
- Click on the plus icon (+) shown under Active API Tokens
- An API token will be generated, copy it and Save the token for further use.