1. Access Methods
In order to access the HappyFox integration, there are two navigations: 1.1 Via Administration 1.2 Via Grid Menu1.1 Via Administration
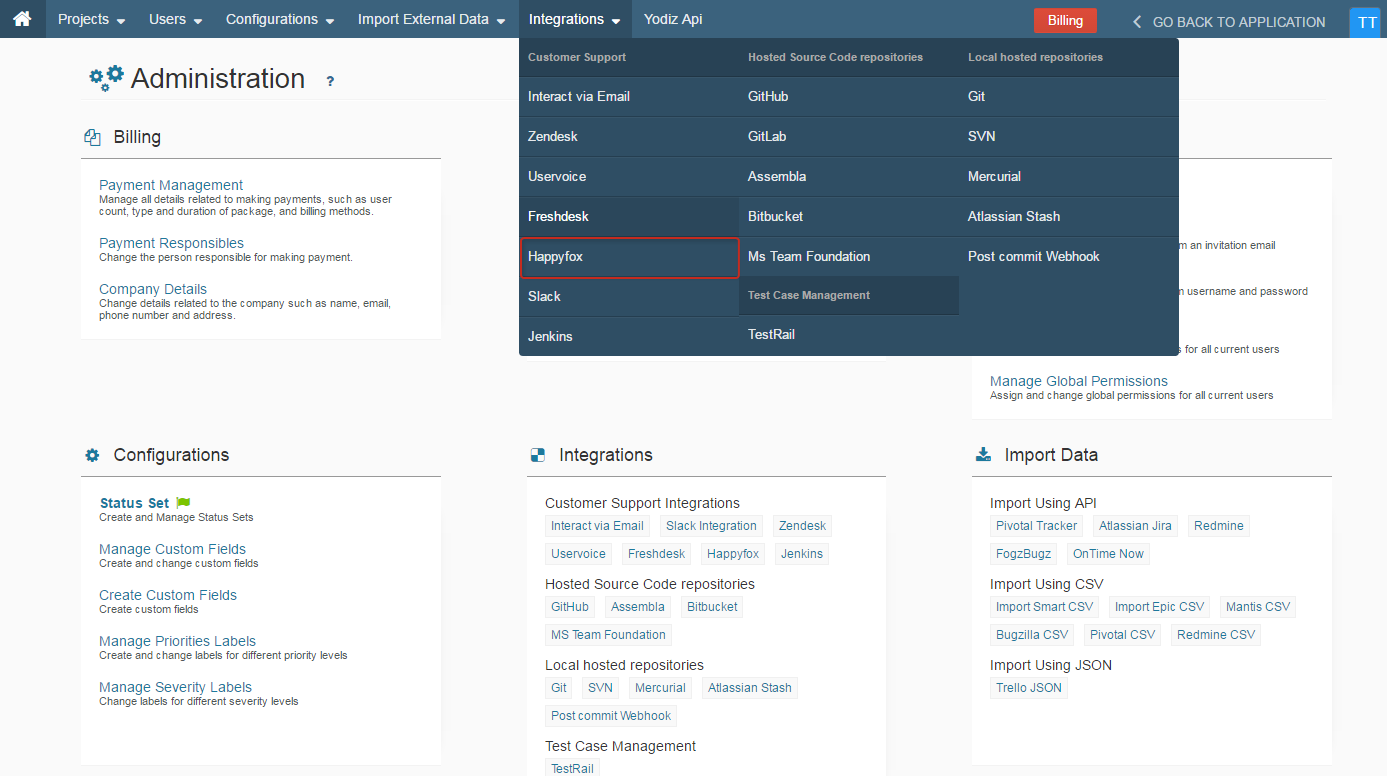
Login to Yodiz app, go to top right settings icon > Administration
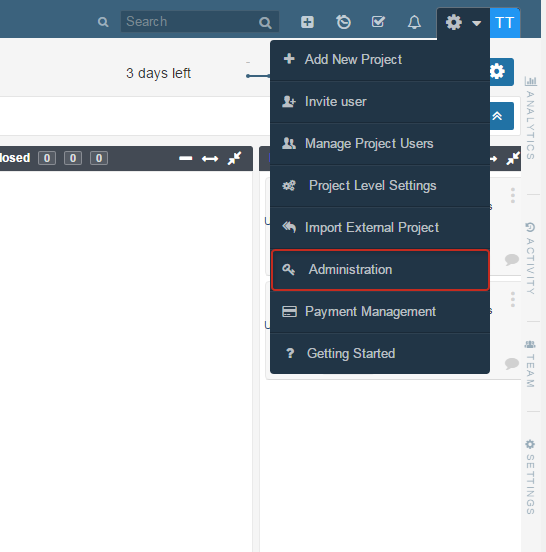
Integrations > HappyFox
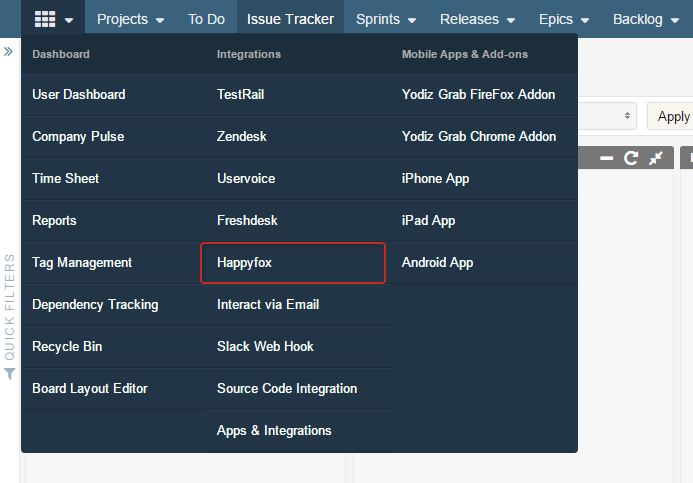
1.2 Via Grid Menu
Login to Yodiz, go to top left Grid Menu > Integrations > HappyFox
2. Account Setup
A popup will appear once you have accessed HappyFox integration via either of the above navigation route. Now, fill the required details in the setup popup.Note: Popup will only appear for the first time when user has not setup any account yet.
You can add more than one account of HappyFox by clicking on the +Add Account option from the left panel. Follow the screenshot below:
 You will be required to fill these fields in order to integrate HappyFox into Yodiz.
Sub Domain: This is your Subdomain that you get when signing up for an account at HappyFox. This will usually be your company name and look something like http://yodiztest.happyfox.com.
For example yodiztest is your domain name in case of http://yodiztest.happyfox.com
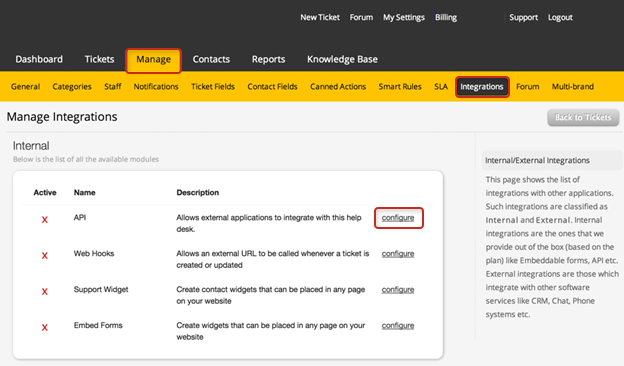
API Key: This is the API key of your Happyfox account. Follow the steps below in order to acquire API key.
You will be required to fill these fields in order to integrate HappyFox into Yodiz.
Sub Domain: This is your Subdomain that you get when signing up for an account at HappyFox. This will usually be your company name and look something like http://yodiztest.happyfox.com.
For example yodiztest is your domain name in case of http://yodiztest.happyfox.com
API Key: This is the API key of your Happyfox account. Follow the steps below in order to acquire API key.
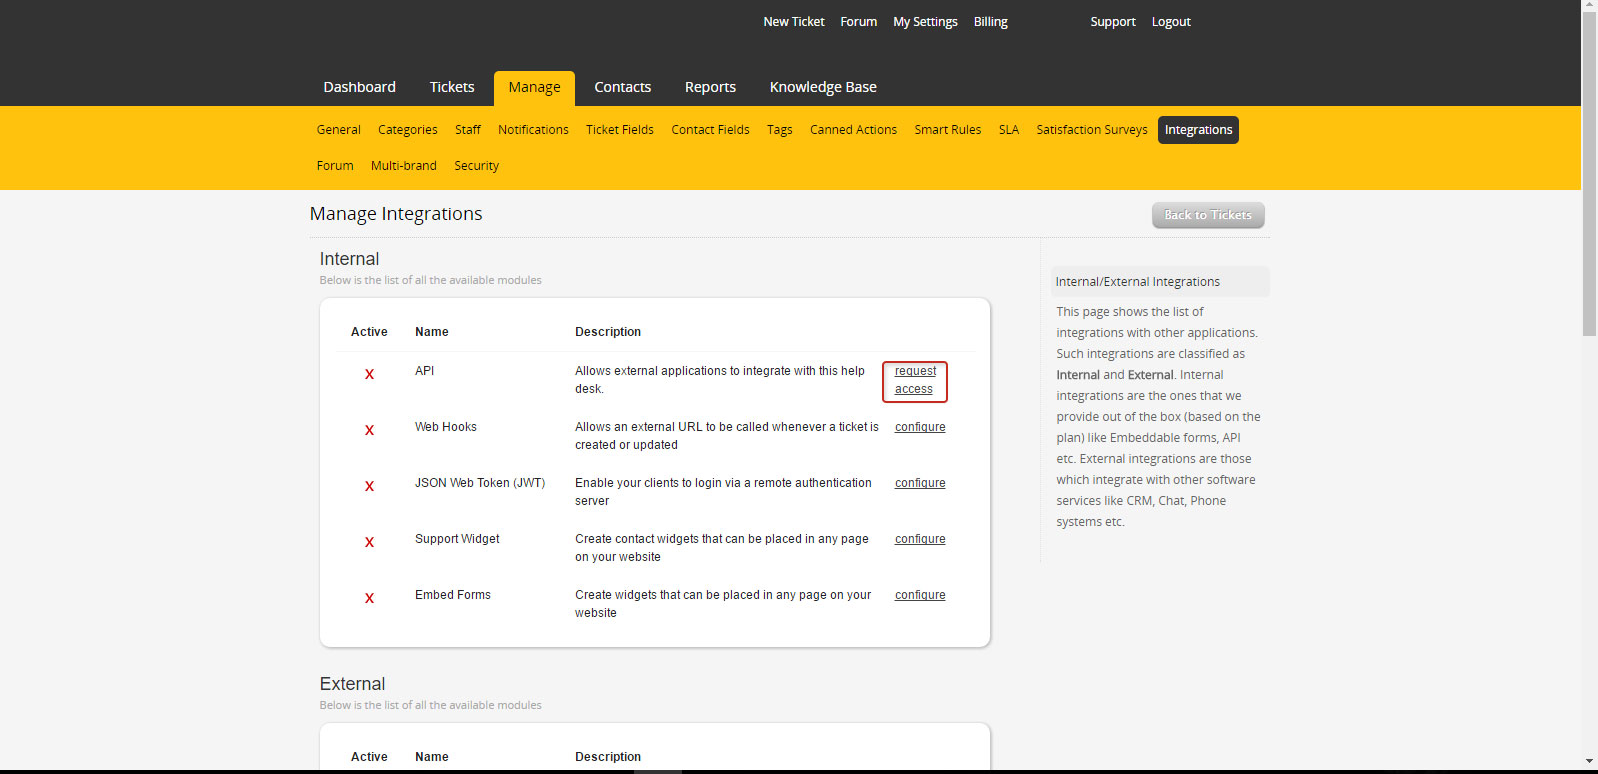
- Login to Happyfox account
- From top menu at Happyfox click on “My Settings”.
- Click on “Manage” and then on “Integrations”.
- If you have not already requested API to Happy Fox Team, then you’ll have to click on “Request Access”.
- Clicking on “Request Access” will prompt you to an email page where you can request for API key.
 Auth Code: It can be acquired with API Key via same method given above.
2.1 Already configured API Key
If you have the access already, then you will just have to click on the Configure option.
- Click on Configure next to API, if it is not already active.
- Click on “API Support Active”, select “Yes” and click on “Save Settings”.
- Click on “Create a new API key”.
Note:
- It is not possible to change Ticket status from Yodiz.
- All Comments made from Yodiz are posted as public.
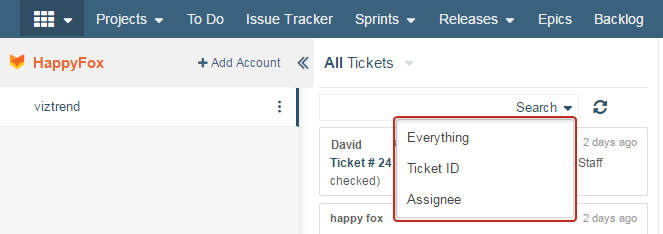
3. Search Tickets
You can Search for specific tickets in desired context. Follow the screenshot below:
Note:
- All Tickets are sorted in descending “Updated on” order by default.
- No further sorting toggle is available for Tickets.
You can also Filter Tickets by their Status.
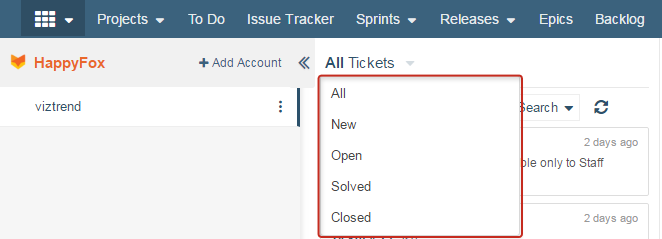
Note: Status of Tickets can be viewed in the header of selected Ticket.
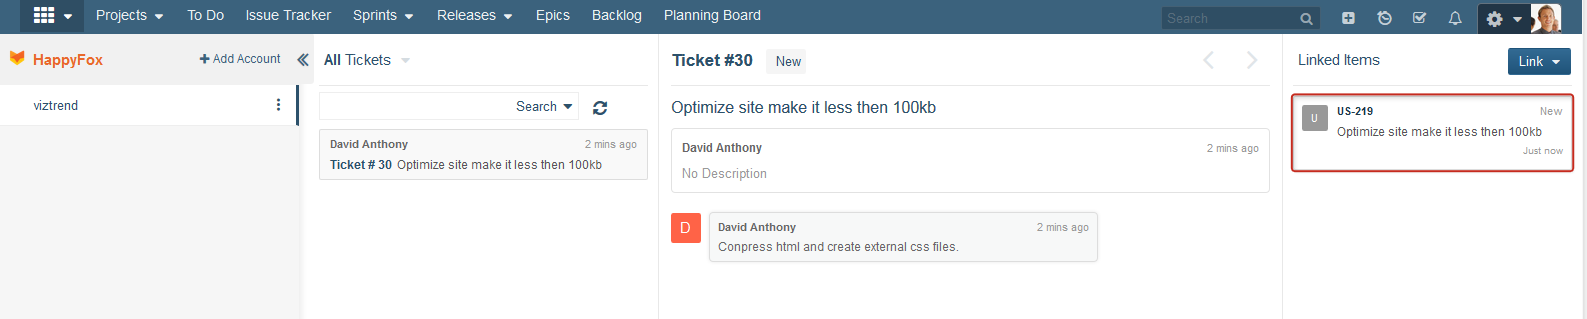
4. Link Tickets with Items
These tickets can be linked to existing items or can be linked to new items (User Story, Issue).Note: In case of Issue Tracker, only Issues can be created or linked.
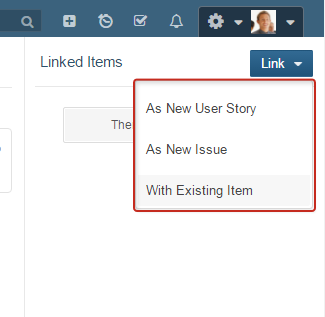 As New User Story: New User Story will be created.
As New Issue: New Issue will be created if you select this option.
With Existing Item: Selecting this item will link the selected ticket with Existing Item (User Story or Issue).
As New User Story: New User Story will be created.
As New Issue: New Issue will be created if you select this option.
With Existing Item: Selecting this item will link the selected ticket with Existing Item (User Story or Issue).
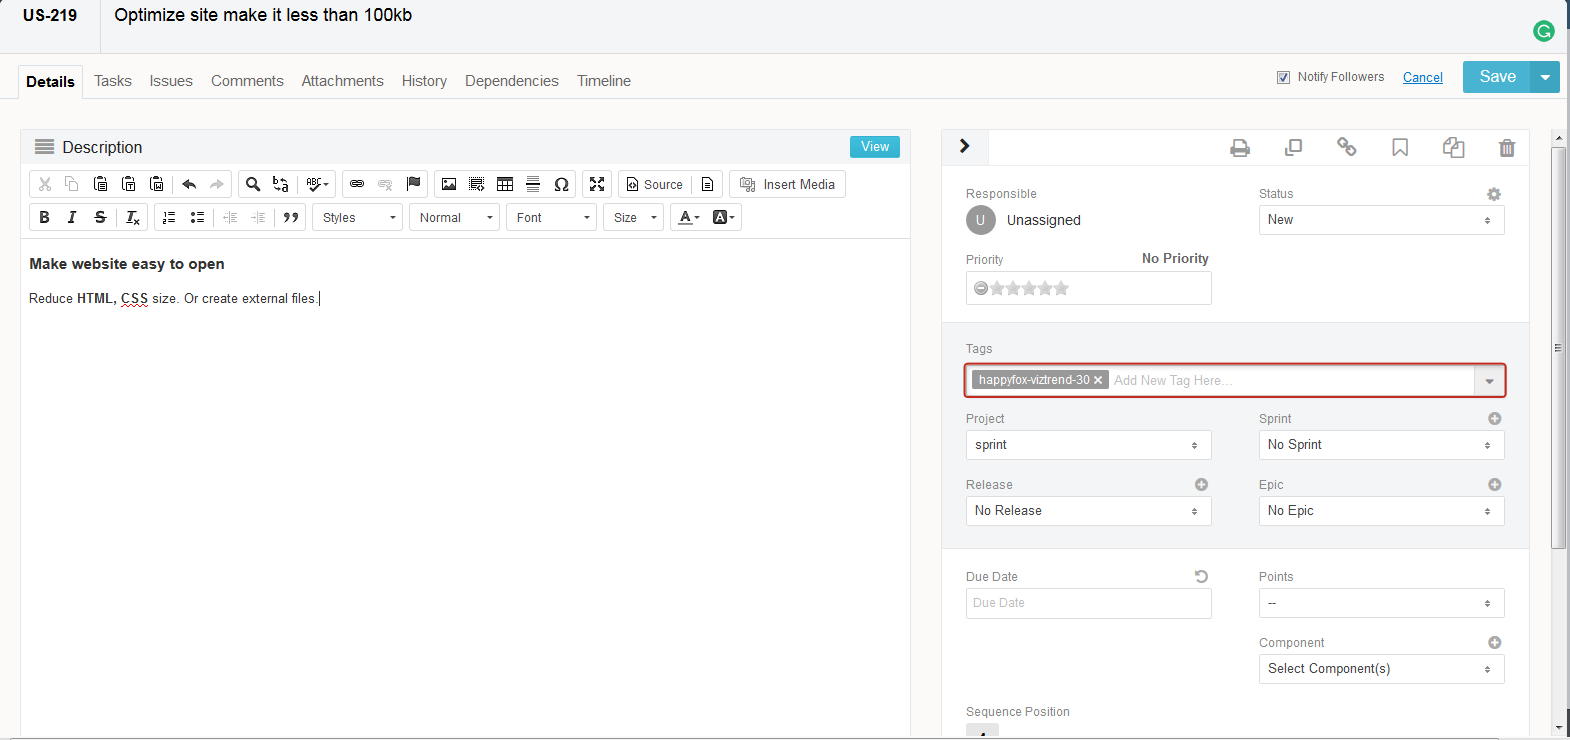
Note: A Tag will be created in case of Linked items which consists of service name-domain name-ticket ID. For example, in this case the tag will be named “happyfox-viztrend-30”. These Tags can only be seen in the item popup, detail and widget view.
5. Unlink Tickets with Items
In order to unlink tickets with items, click on the ID of linked item.
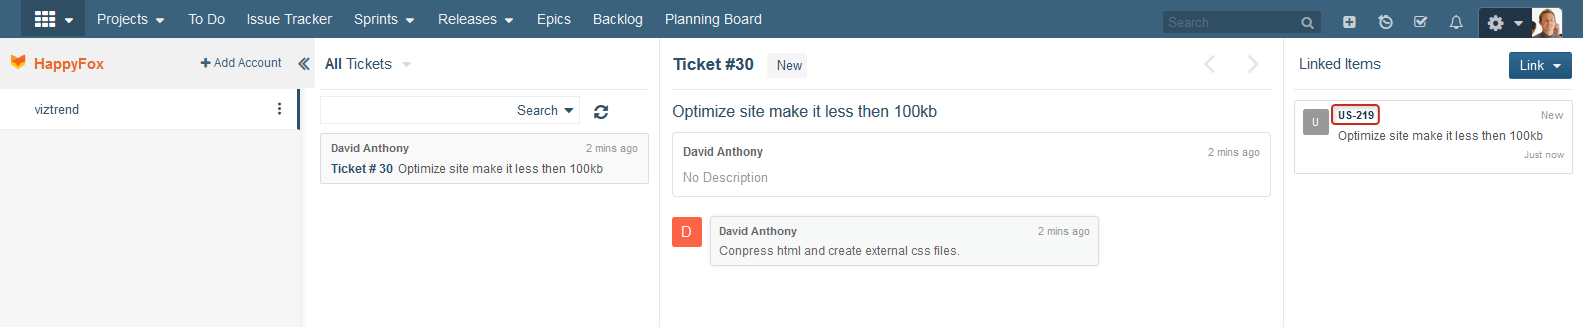
Once the pop up view of the item opens, remove the Tag (consisting of service name-domain name-ticket ID) from the Tags bar and click on Save. You can choose to Cancel if you want to revert the changes.
Note: You can unlink the Tickets from Detail view of items as well as Popup-view & Widget view.
6. Unlink Account
Integrated HappyFox account can also be unlinked from Yodiz. The list of integrated accounts can be viewed in the far left panel of the screen. Click on the ellipses icons and select Unlink option.
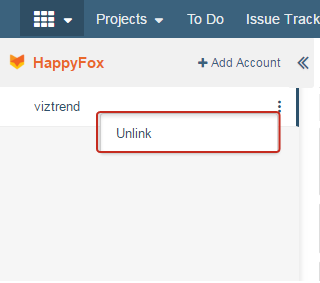 Your account is now unlinked.