There are two methods to add Components.
- Via Project Level Settings
- Via Inline Method
Related: how to Manage Components?
Via project level settings
Go to Settings Icon > Project Level Settings > My Projects > Your Desired Project > Settings > Manage Components > Add Components.
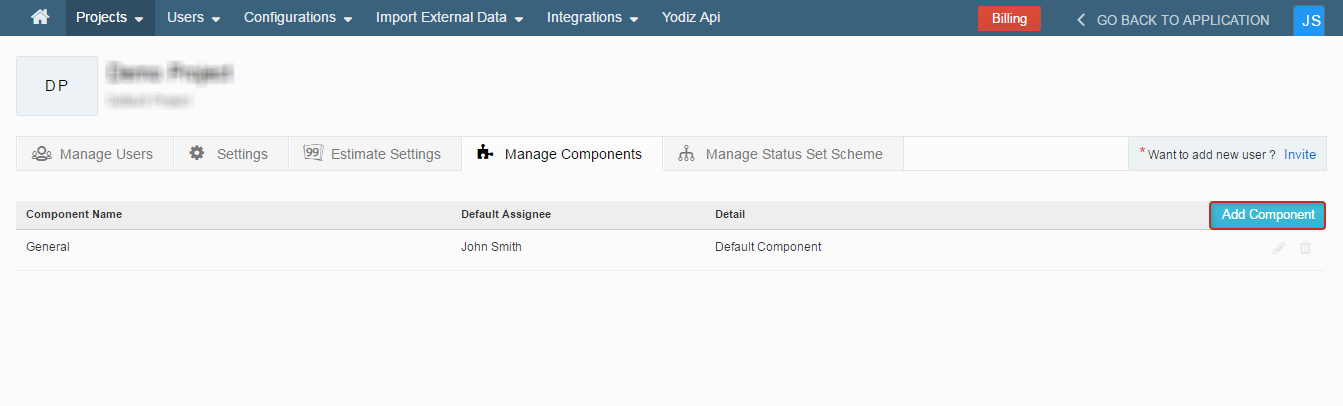
A pop-up will appear after clicking on “Add Component” button.
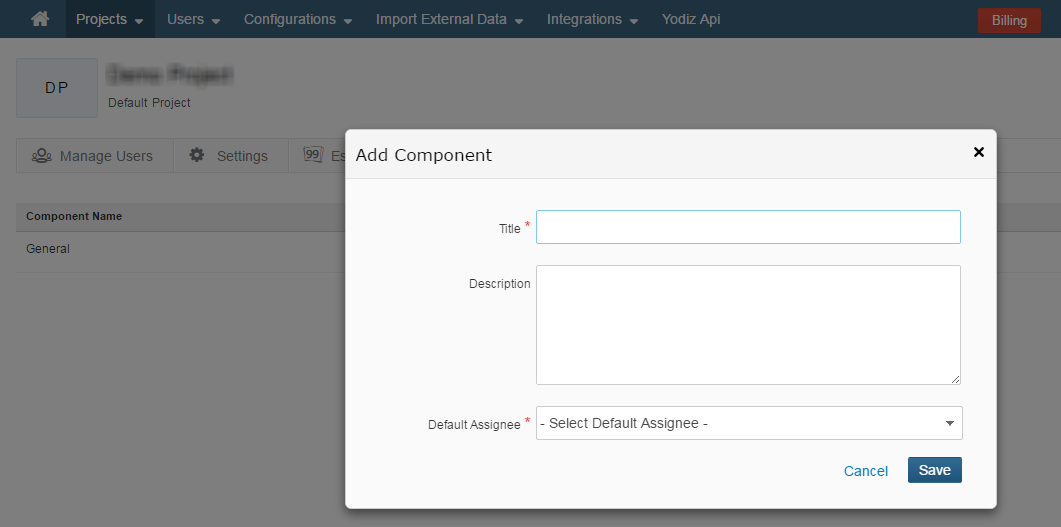 Title: Title of the Component. (Mandatory Field).
Description: Description of component. (Optional Field)
Default Assignee: Choose an assignee from the drop down list. (Mandatory Field)
Click on save and you are good to go.
Title: Title of the Component. (Mandatory Field).
Description: Description of component. (Optional Field)
Default Assignee: Choose an assignee from the drop down list. (Mandatory Field)
Click on save and you are good to go.
Via Inline Method
Components can be added on the go in the Popup and Detail View of Issue and User Story.
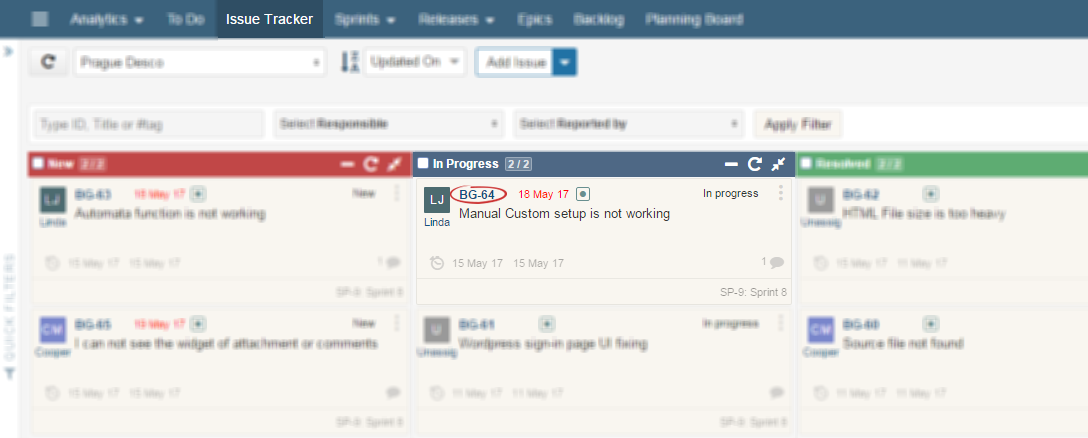
Clicking on the item ID of the Issue or User Story (as indicated above), item’s Popup view will open.
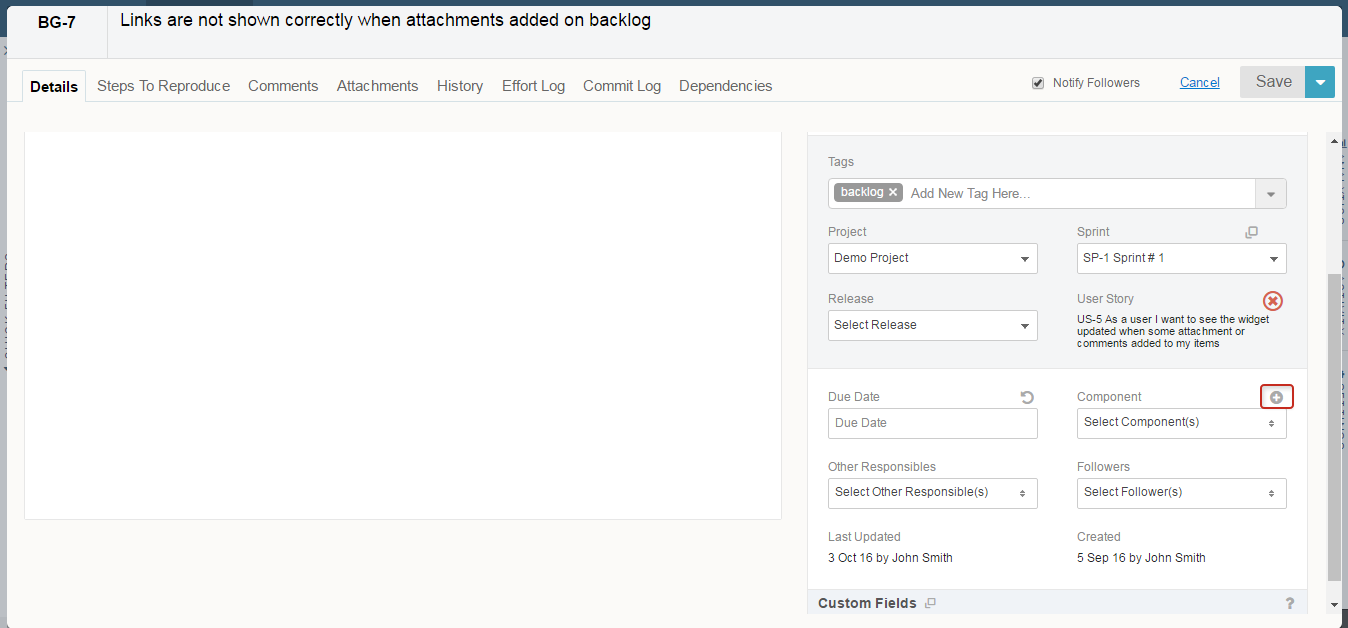
Click on the highlighted icon + on top of Component field to “Create New Component”, another small popup will open from there onwards, follow the screenshot below.
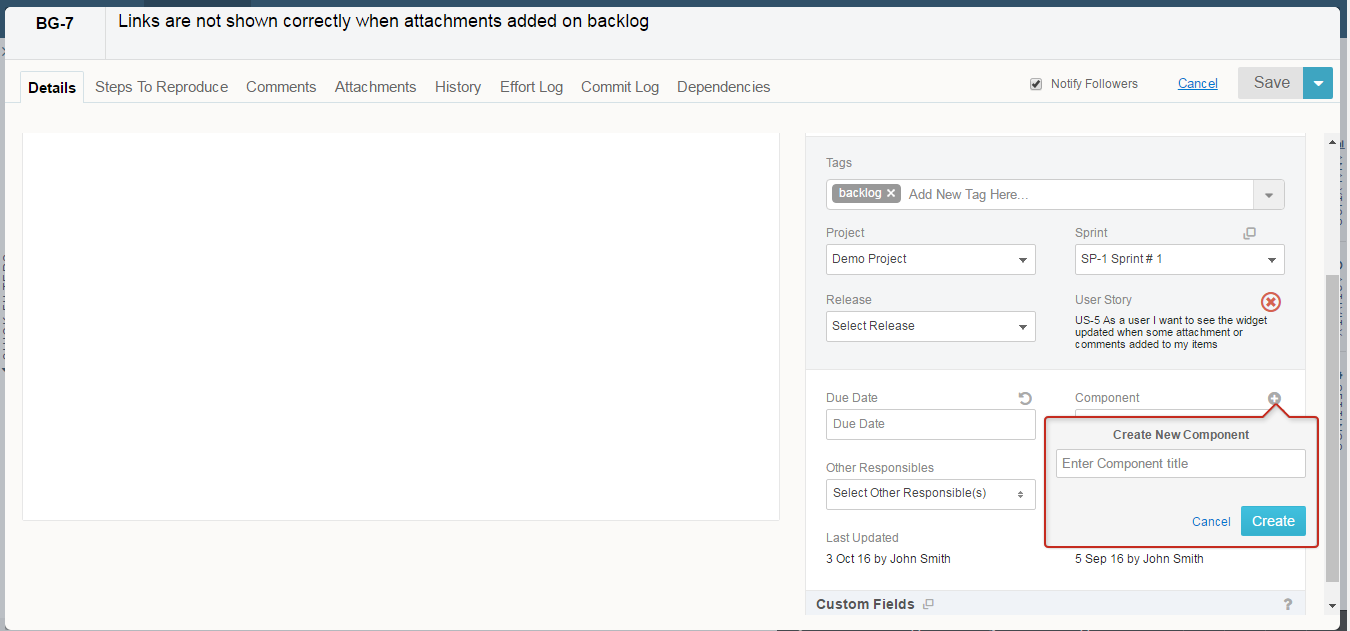
Enter Component Title and click on Create. You can even Cancel creating a Component if you wish. Click here For more information about Special tags, Tags Management and “Special Tags” vs “Standard Tags.