Issue Tracker Board is a productive board which helps to store and keep track of all the Issues reported in a project.
Let’s explore this board in detail.
1. Monitor Issues
Yodiz gives you complete flexibility to track issues, use it according to your choice. You can view Items as the list or grid view on Issue Tracker board. Go to Issue Tracker Board, find the grid/list ![]() icon at the top under navigation menu. Let’s give you complete details regarding both these boards.
icon at the top under navigation menu. Let’s give you complete details regarding both these boards.
1.1 List View
The Items in this view are shown as the list. There are multiple columns showing the Status, Severity, Responsible etc of the Item. You can add custom columns in List view.
1.1.1 Add Custom Columns in List ViewYou can add additional Custom Columns in your default list view. Use the Columns drop down provided below the Navigation menu on the right side. You can add any of listed values in the dropdown as columns, for instance, if you need to see Due Date for each Item. Add Due date as column and you can sort your Items based on Due Date.
1.2 Grid View
Grid View comes in handy when you want to track the status wise progress of each Issue. Issues are shown as widgets in each panel according to their Status category. Click on the ID of Issue in order to open details of the Issue. You can use drag and drop functionality in grid view.
2. Report an Issue
You can add new Issues directly on the Issue Tracker board by clicking on the Add Issue dropdown provided below main navigation. You have choice to add Issues faster by putting only essential information using Quick Add or by adding the Issue with complete details.
2.1 Convert Email to an Issue
You can directly convert an email to an Issue by using Interact via Email
3. Prioritize Challenging Issues
You can set Issues priority by setting Issue Severity. There are several priority options provided in the Issue details. Just open the Issue and set the priority for Issue for example Blocker, Normal, Major etc.
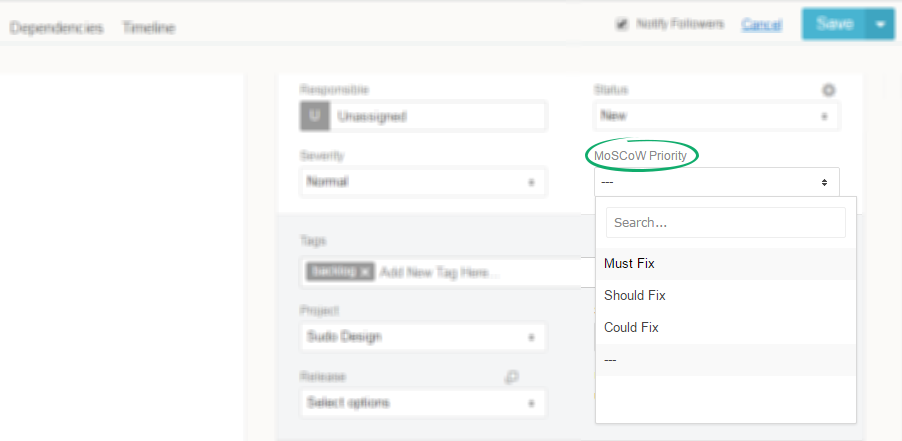
Another layer of prioritization is the MoSCoW priority, which includes the prioritization options like Must Fix, Should Fix and Could Fix.
You can use the drag and drop option to prioritize the most important Issues, this way you can keep the most important Items at the top.
Note: Drag and Drop Items within the same panel only works when items are ordered in Sequence order. Use built-in Order By filter barand set value as “Sequence”.
Dragging options in the other columns update the status of item according to the column it is dropped in.
4. Schedule Issues with Calendar
Yodiz gives you the power to control your Yodiz boards with complete customization and endless features. The calendar view is one such example, you can use the Issue Board calendar feature to schedule your Issues. When you open Calendar view, all unscheduled Items appear in the left column. You can drop Items from unscheduled column into the calendar. Learn more about How to Use Calendar?
5. Log Your Effort
Yodiz gives you the ability to completely track your work Items by providing the Log Effort feature. You can log effort on Issues by clicking on the “Clock” icon on the Issue Widget. A popup will open.
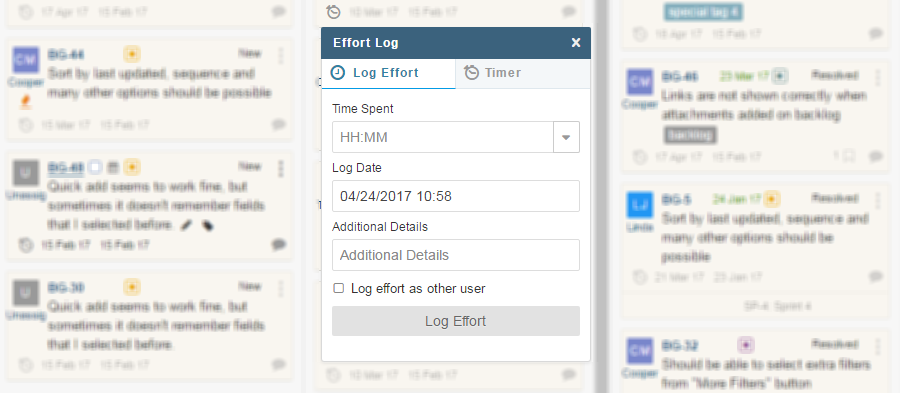
Enter the Time Spent and Log Effort. You can also start the Timer, start timer when you start working on the work item and stop it when you have completed your work.
6. Find Your Issues
You can view the Issues reported in entire project from this board. However, you can use the filter functionality to find the specific Issues. You can use filters on various criteria like Responsible or Reported by. There is a list of more filters provided at the top right side of the board under navigation menu. You can choose to see the Issues in which you’re Responsible. Learn more about using Search and Filters.
7. Bulk Edit on Issue Tracker
Editing multiple Items individually can be hectic, that’s why Yodiz offers Bulk Edit feature for Issue Tracker. All you have to do is select the Items you want to edit;
- Select (checkbox appears when you hover on Item) each Issue Individually
- Select the entire panel from the checkbox provided at the top of each Panel
Note: You can uncheck Issues from panel if you even selected the entire panel.
Once you have selected Issues, a blue bar button will appear in the middle under main navigation menu, clicking on it will open the Bulk Edit sidebar. You can perform various actions on the selected Items, you can even associate multiple Issues to a User Story or move the selected Issues to other project.
8. Right Navigation Panel
Right Navigation Panel on Issue Tracker provides multiple quickly accessible functionalities.
8.1 Analytics
Analytics Tab in the right navigation panel shows the real time progress of Issues. You can learn more about how these statistics appear by Open Issues – Real-time status graph.
8.2 Activity Feed
Keeping track of the activities happening in the Issue Tracker board becomes very convenient with the Activities Tab. It is accessible from the right navigation panel and provides constant updates regarding all Items in Issue Tracker board. The most recent activities are shown at the top and you can even filter your Activity Feeds via the filter icon provided at the top right under Activities Tab.
8.3 Settings
You can use the settings tab to customize your board via Board Layout Editor and export your Issue Tracker data.You can export your entire Issue Tracker data in various formats like CSV, JSON, XML and Excel.
9. Issue Tracking with Widgets
You can access Issue Charts and Graphs through this navigation.
Following is the list of Charts and Graphs related to Issue:
- Issue Component Report
- Open Issues
- Open Issues – Real-time status
- Issues by Components (per User)
- Issue Trend Report
- Issue Statistics
- Issues Assigned to Users
- Issue Severity by Responsible